1 What Is Cortex Code?
Cortex Code is the AI-powered programming assistant built into Snowsight, Snowflake's web interface. It lets you generate SQL, Python, and Streamlit code directly from natural language, accelerating the development of analytical solutions.
Key capabilities
- SQL code generation — CREATE TABLE, INSERT, views, procedures, functions
- Cortex AI/ML — ML.CLASSIFICATION, ML.FORECAST, CORTEX.COMPLETE, CORTEX.SENTIMENT, Cortex Search
- Feature Store — Entity, FeatureView, get_features()
- Model Registry — log_model(), get_model(), versioning
- Streamlit — Interactive dashboard generation
- Tasks & Pipelines — Automation and orchestration
Important: Cortex Code generates code that runs in your Snowflake account. Everything stays within your environment — no external dependencies, no data sent outside.
2 Prerequisites
Before you begin, make sure you have the following set up:
Snowflake account
Important: Ask your Snowflake representative to create the required accounts for your team. This ensures all Cortex Code and Cortex AI features are supported: ML.CLASSIFICATION, ML.FORECAST, CORTEX.COMPLETE, CORTEX.SENTIMENT, Cortex Search, and Feature Store.
Access Cortex Code in Snowsight
Once inside your account, the Cortex Code assistant panel appears on the right side of the screen. It is your AI programming companion for running all the prompts in this catalog:
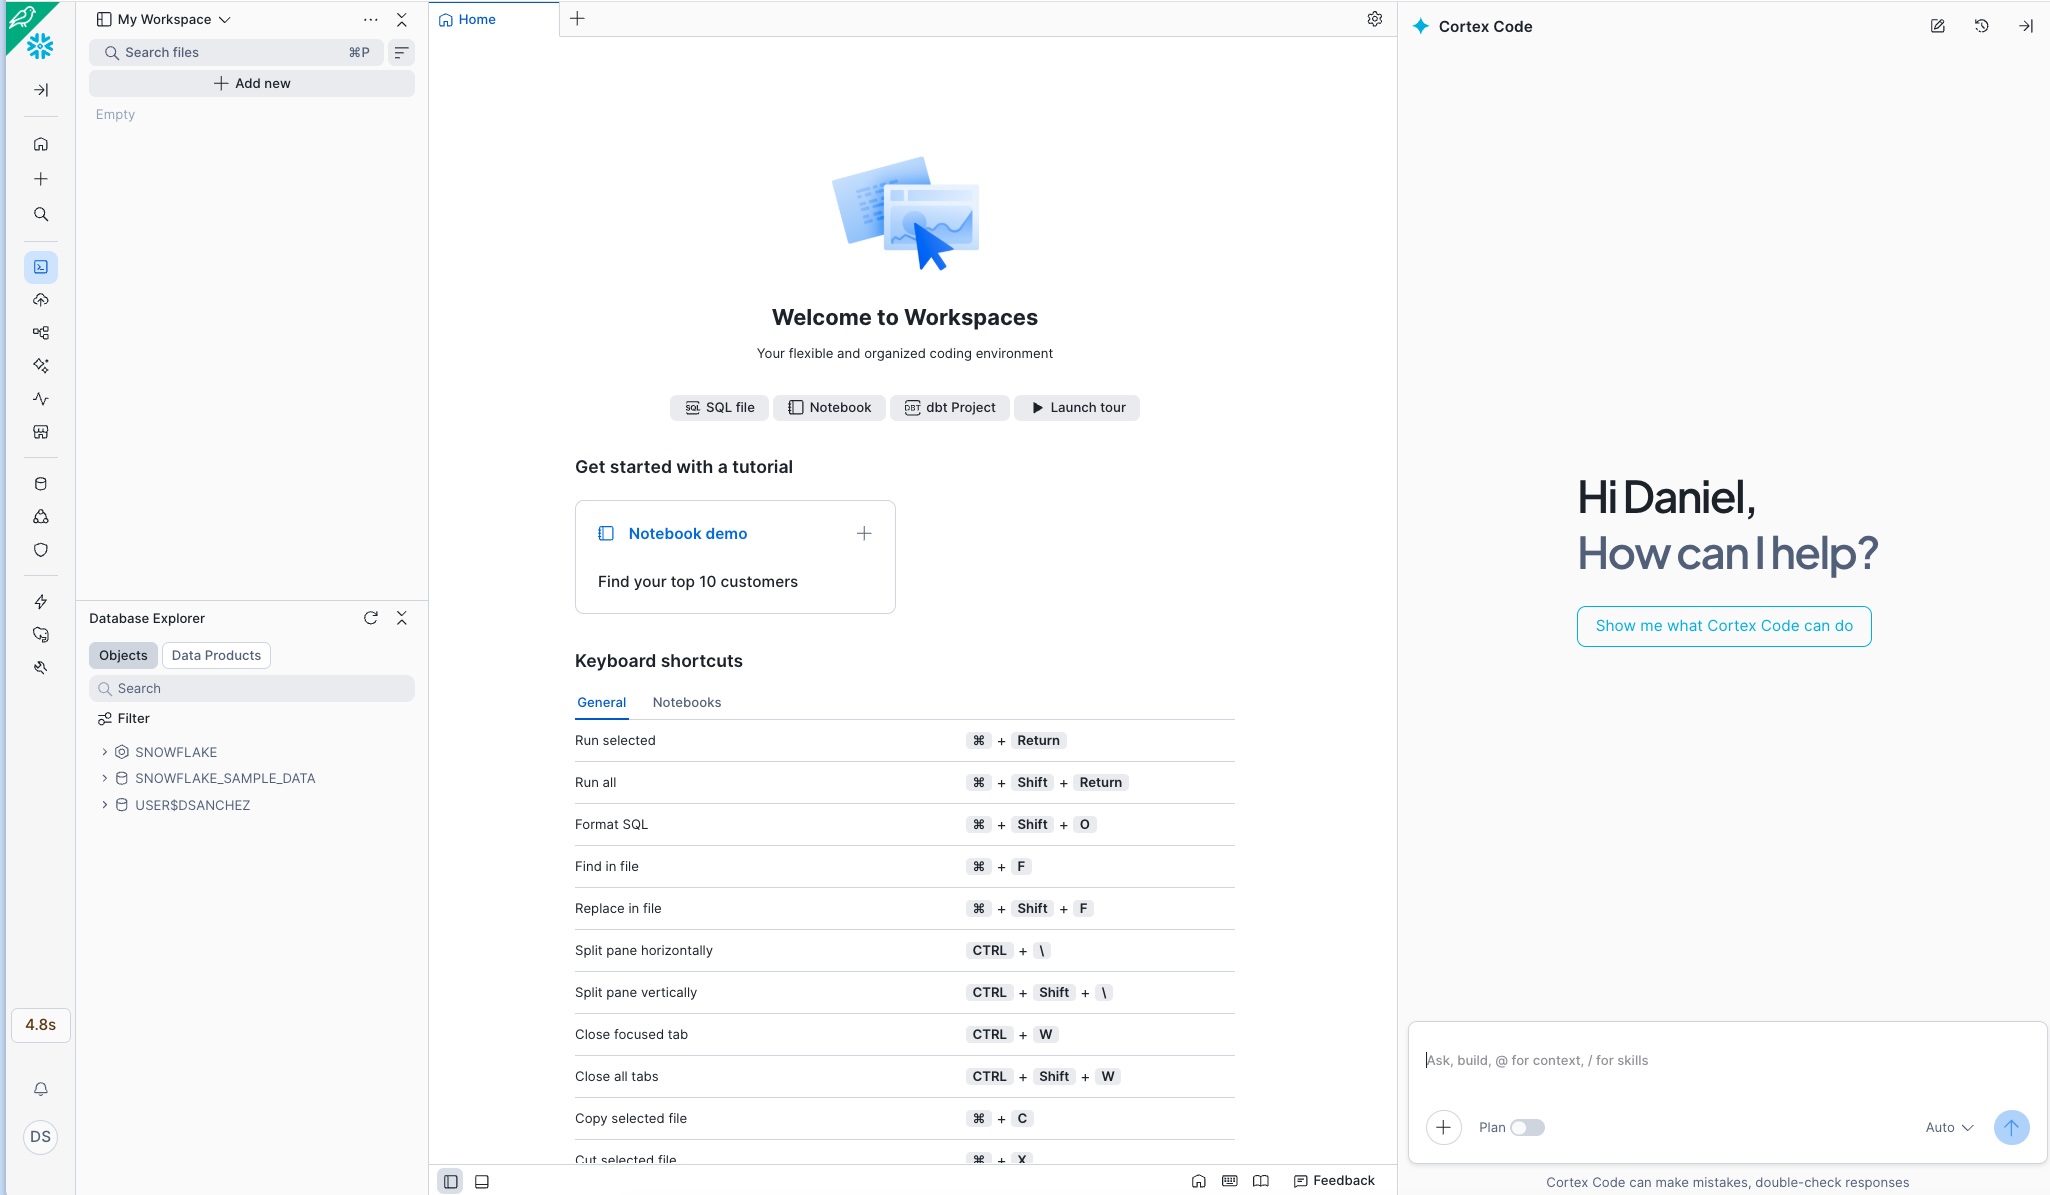
Ready: If you see the Cortex Code panel with the message «How can I help?» on the right, you can start copying and pasting the prompts from any use case.
Account and permissions
- Snowflake account with Snowsight access
- Role with CREATE DATABASE, CREATE SCHEMA, CREATE TABLE permissions
- Active warehouse (recommended: size S for development, M for production)
- Cortex Code enabled on the account (available in all editions)
For advanced features
- Cortex AI/ML: Requires a region that supports Cortex Functions (AWS us-west-2, us-east-1, eu-west-1, etc.)
- Feature Store:
snowflake-ml-pythonpackage available - Model Registry: Permissions to create models in the schema
- Streamlit: CREATE STREAMLIT permission on the schema
Note on regions: Some Cortex AI features (such as ML.CLASSIFICATION or CORTEX.COMPLETE) require specific regions. Check the availability documentation to verify your region.
3 Open Cortex Code in Snowsight
Cortex Code is integrated into several Snowsight surfaces. Here are the ways to access it:
Option A — From Workspaces
- Go to Snowsight → Projects → Workspaces
- Create or open an existing workspace
- Click the Cortex icon (✨) in the right sidebar, or use the shortcut Cmd+Shift+Space (Mac) / Ctrl+Shift+Space (Windows)
- The Cortex Code panel will open to the right of the editor
Tip: The Cortex Code panel maintains the context of your workspace. If you have tables referenced in the editor, Cortex Code will use them as context to generate more accurate code.
4 Add the Best-Practices Skill to Cortex Code
To improve the performance and reduce the cost of the generated code, you can add the best-practices skill to Cortex Code. Once loaded, it will be available before each prompt and will guide the assistant to generate more efficient code optimized for Snowflake.
4.1 — Download the skill
Download the compressed file containing the best-practices skill and save it to your computer:
4.2 — Extract locally
Extract the downloaded file on your computer. You will get a folder called best-practices containing the skill files ready to upload.
Tip: Extract to an easy-to-find location (for example, your Desktop or Downloads folder), since in the next step you will need to select it from Snowsight.
4.3 — Upload the skill to Cortex Code in Snowsight
In Snowsight, inside the Cortex Code panel, click the + button, select the «Upload Skill Folder(s)» option, and choose the best-practices folder you just extracted locally:
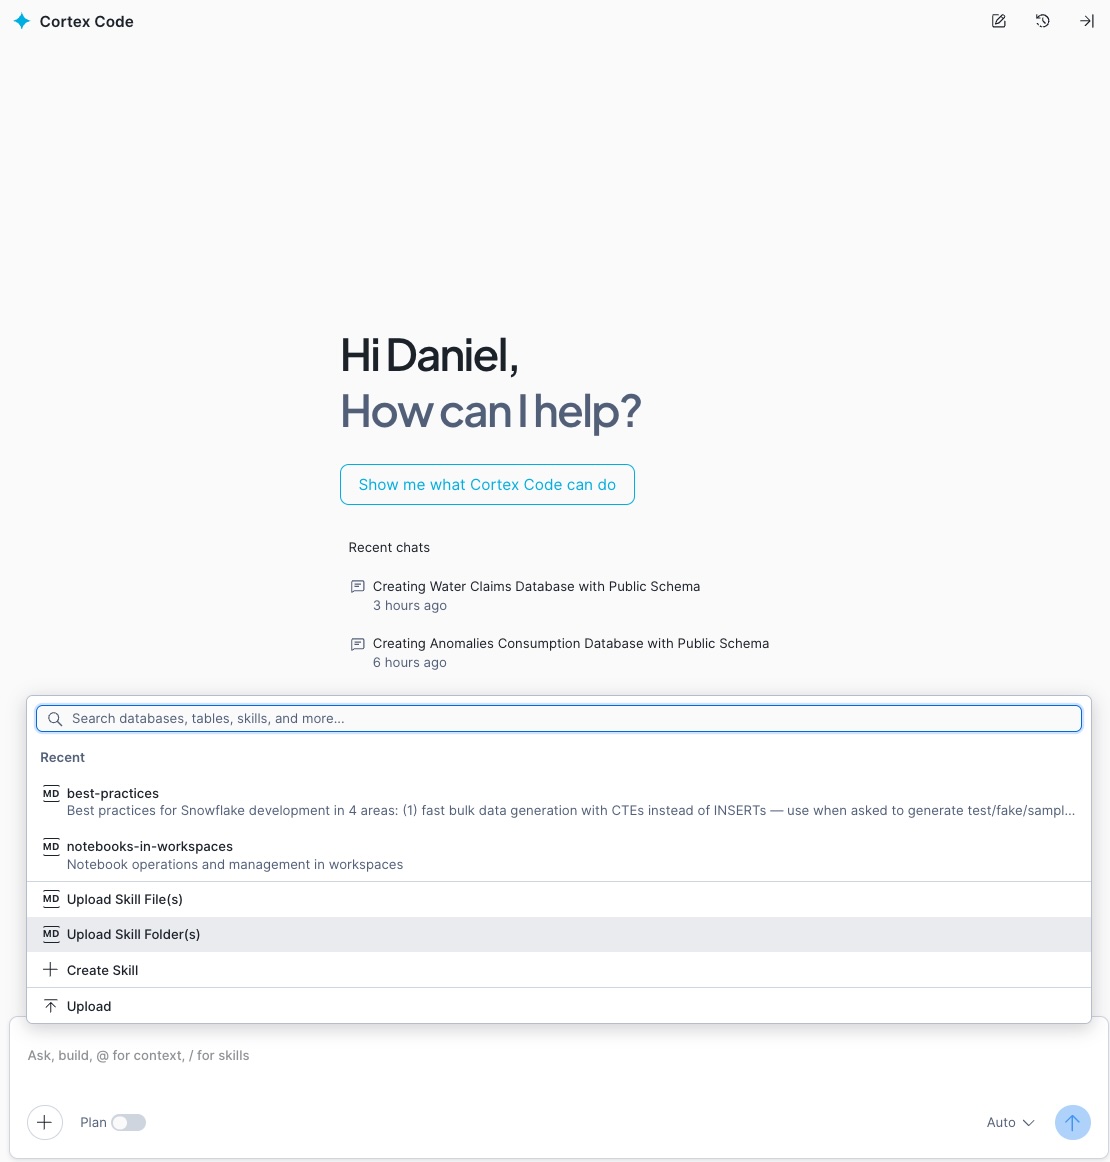
Note: The + button is located at the top of the Cortex Code panel, next to the context selector. Clicking it will display a menu — select «Upload Skill Folder(s)» and navigate to where you extracted the skill.
4.4 — Use the skill before each prompt
Once uploaded, the skill will be available in your Cortex Code session. Type the /best-practices command before each prompt to activate it and get more efficient code:

Ready: With the skill active, Cortex Code will automatically apply Snowflake best practices to all generated code: efficient warehouse usage, clustering keys, query optimization, and credit cost reduction.
5 Prompt Workflow
Each use case in this catalog includes between 8 and 11 sequential prompts. The recommended workflow is:
use case
Guide
Cortex Code
each prompt
execute
Structure of each use case
When you click «View Prompts» on any use case card, you will see:
- Step 1 — Set up environment: Creates the database, schema, and warehouse. Always the first prompt.
- Steps 2-4 — Create data: Generates tables with representative synthetic data for the domain.
- Steps 5-7 — Analyze and model: Features, ML models, Cortex AI functions, Feature Store, or Model Registry.
- Steps 8-9 — Dashboard: Streamlit code for interactive visualization.
- Last step — Pipeline: Tasks for automation and continuous operation.
Sequential execution: The prompts are designed to run in order. Each step depends on the objects created in the previous steps. Do not skip steps.
6 Run a Use Case Step by Step
Let's walk through the complete process with a practical example:
6.1 — Select industry and use case
- Go to the industry catalog
- Choose an industry (for example, Banking)
- Browse the cards or use the search bar to find a use case
- Read the «Problem» section to understand the business pain point
6.2 — Read the Guide
- Click «View Guide»
- Read the sections: Context, Focus, Challenge, Objectives, Features, Data, Stratification, and How to Use
- This will give you the conceptual framework before generating code
6.3 — Execute the Prompts
- Click «View Prompts»
- In Snowsight, open a workspace and activate Cortex Code
- For each step:
- Click «Copy» on the prompt
- Paste it into the Cortex Code panel
- Cortex Code will generate the corresponding SQL/Python code
- Review it before executing (see section 7)
- Click «Run» or «Apply»
- Verify that it executed successfully
- Move on to the next prompt
Expected result: At the end of all steps you will have: a database with synthetic data tables, trained ML models, configured Cortex AI functions, and a functional Streamlit dashboard.
7 Review and Validate the Generated Code
Cortex Code generates high-quality code, but you should always review it before executing. Key points:
Review checklist
- Object names: Verify that the database, schema, and warehouse match your environment
- Warehouse size: Adjust the size according to your workload (S for development, M-L for production)
- Synthetic data volume: The prompts suggest representative volumes; adjust as needed
- LLM models: Verify that the referenced model (e.g.,
llama3.1-70b,mistral-large2) is available in your region - ML functions: Confirm that ML.CLASSIFICATION, ML.FORECAST are available
- Permissions: Your role must have the necessary grants on the objects
Adapt to real data
The prompts generate synthetic data for demonstration. To move to production:
- Replace the synthetic
CREATE TABLE ... INSERTstatements withCREATE VIEWorSELECTon your real tables - Adjust column names to match your data model
- Modify the business thresholds and parameters
- Keep the structure for features, models, and dashboards
Synthetic data: The generated data is fictional and representative. Do not use it in real business reports. It serves to validate the end-to-end pipeline before connecting real data.
8 Deploy Streamlit Dashboards
Nearly all use cases include a prompt to generate a Streamlit dashboard. Here is how to deploy it:
8.1 — Generate the Streamlit app
- Execute the «Dashboard» prompt (usually the second-to-last step)
- Cortex Code will generate Python code with Streamlit
- Go to Snowsight → Projects → Streamlit
8.3 — Verify and share
- Check that all charts and tables load correctly
- If there are errors, verify that the tables and views exist (they were created in previous steps)
- Share the app with other users using «Share»
9 Automate with Tasks and Pipelines
The last prompt in each use case creates Snowflake Tasks to automate the pipeline:
What gets automated
- Data ingestion: Periodic loading from sources (daily, weekly)
- Feature updates: Recalculate indicators and metrics
- ML scoring: Run models on new data
- Alerts: Notifications when thresholds are exceeded
- Retraining: Periodically update models
Typical Task structure
Task DAGs: Advanced use cases create DAGs (Directed Acyclic Graphs) where some Tasks depend on others. Cortex Code automatically generates the dependencies using AFTER.
10 Check Usage Costs
After running one or more use cases, use this prompt in Cortex Code to get a consolidated summary of all credits and tokens consumed on the current day: warehouses, Cortex AI functions, ML models, and Cortex Code in Snowsight.
Prompt — Daily cost summary
Copy and paste this prompt directly into Cortex Code (remember to activate /best-practices first):
Note: ACCOUNT_USAGE data has a latency of up to 45 minutes. If you just ran a use case and no data appears, wait a few minutes and rerun the query.
Alternative: If CORTEX_FUNCTIONS_USAGE_HISTORY is not available in your account, Cortex Code will automatically replace that section with METERING_DAILY_HISTORY using service_type = 'AI_SERVICES'.
11 Tips and Best Practices
Development
- Always use
/best-practicesbefore each prompt — Activate the skill so Cortex Code generates code optimized for performance and cost from the first step - Execute one prompt at a time — Don't try to run all prompts at once; each step validates the previous one
- Name your objects consistently — The prompts suggest descriptive names like
BANKING_FRAUD_DB - Save your worksheet — Each use case generates a lot of code; save frequently
Cortex Code
- Be specific in your prompts — The catalog prompts are already detailed, but you can add your own business context
- Iterate on the code — If the generated code isn't exactly what you need, ask Cortex Code to adjust it
- Use worksheet context — If you already have tables in the editor, Cortex Code will automatically reference them
- Combine prompts if needed — For advanced users, you can combine 2-3 steps into a single longer prompt
Production
- Replace synthetic data with real data — The pipeline works the same way; you only change the data source
- Set up Resource Monitors — Control warehouse credit consumption
- Review permissions — Use specific roles for each project (data_scientist, analyst, etc.)
- Monitor Tasks — Review the execution history in Activity → Task History
- Version your models — Use cases with Model Registry already include versioning; use it for A/B testing
12 Frequently Asked Questions
best-practices.zip file), extract it on your computer, and upload the folder to Cortex Code from the + button in Snowsight. Once uploaded, it will be available with the /best-practices command and you won't need to repeat the process.